 Fitness Trainer Workbook - User Guide
The Fitness Trainer Workbook is designed for you, the Fitness Trainer professional. It will enable you to track your clients fitness progress all in one place. Features include:
- Ability to track an unlimited number of Clients through various phases of development (Foundation, Burn, Build, Strength).
- Ability to capture Client Assessment data for each phase (start / end).
- Ability to set up workouts using either predefined workouts and exercises from the app library or your own programs. Programs you create can be saved to the app library for re-use.
- Video capture and analysis/edit capability that Trainers can use to show a client how to improve their exercise movements.
- Reports that can be sent to the Client regarding progress, as well as exercise / nutrition “homework” (things to work on).
- Pre-loaded libraries for Assessments, Workouts, Exercises that are fully customizable.
- Client profile including preferences, goals, nutrition notes, health notes and PAR-Q (Physical Activity Readiness Assessment).
- Can be used without internet access.
- Customizable search capabilities.
- Support for multiple trainers on the same device.
- Calendar / scheduling (internet required for this feature).
- Links to Body Diagram based exercises (internet required for this feature).
Set Up
Managing Libraries
Managing Clients
Training Methodology - Assessments / Workouts
Adding Items
Editing Items (or getting more information about an item)
Deleting Items
Searching
Screen Shots
To begin, you must create a Trainer ID. You can do this in the Trainer Set Up area located on the Settings screen. The Settings screen can be accessed from the bottom tool bar. Once in the Settings screen, select the “Set Up or Change >” instruction. Then select +Trainer to set up your personal trainer identification. Once you have entered the required information, select “Save”. This will create a Trainer userID for you and initialize the Assessment, Workout and Exercise libraries.
These libraries, along with any Client data you enter will be associated with your Trainer ID. It is possible to create multiple Trainer Ids, for example if multiple trainers are sharing this device, or if you want to associate a Trainer ID with a specific type of training (which then has it's own specialized libraries). Libraries and Clients are not accessible across Trainer IDs.
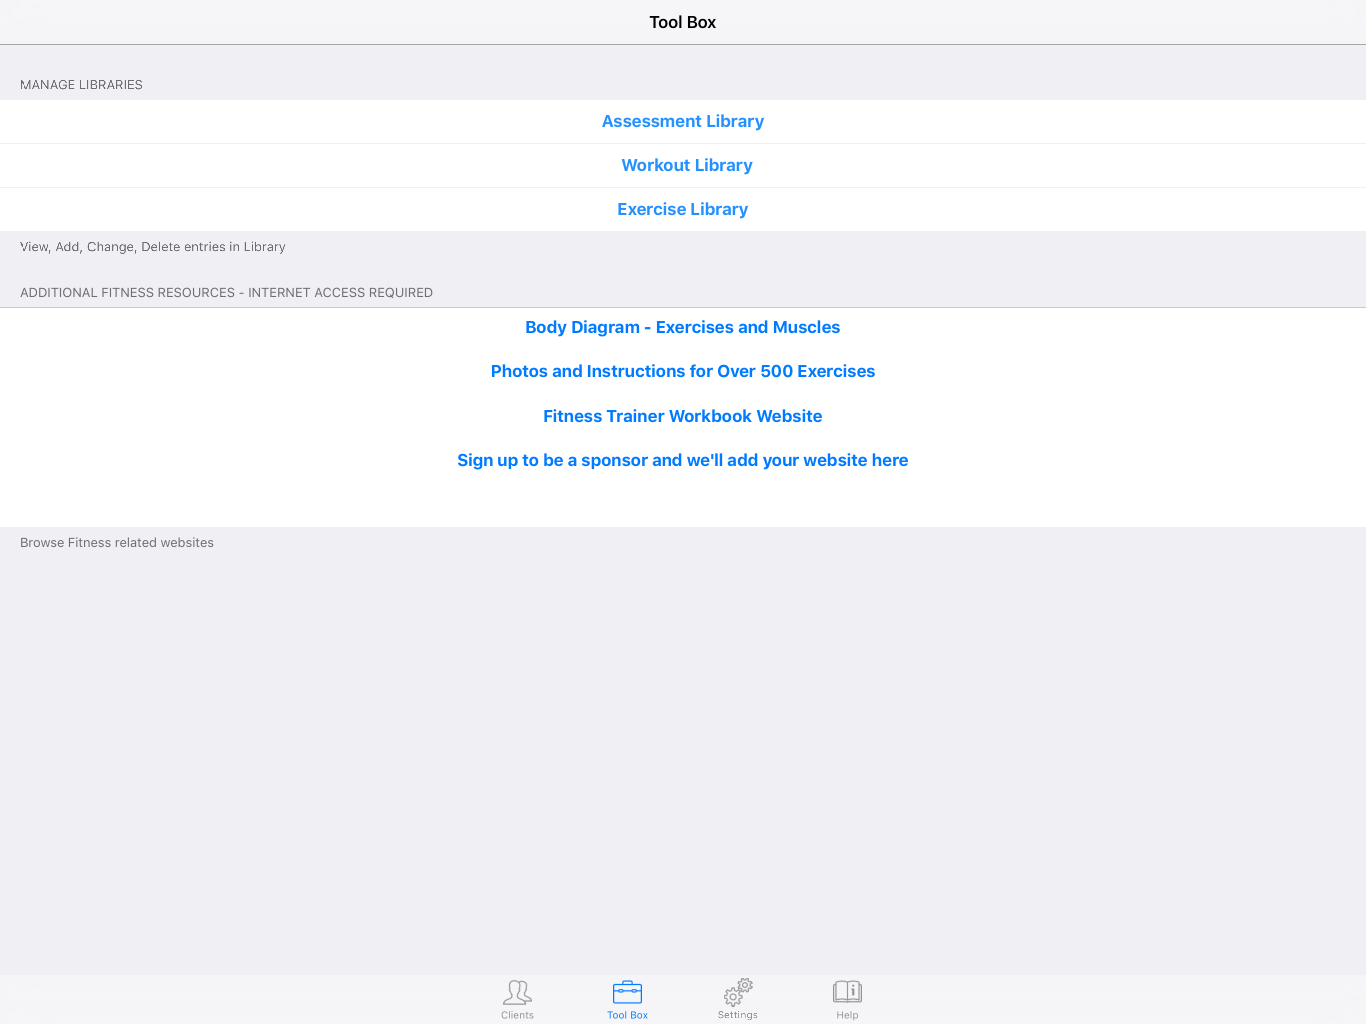
The Tool Box tab enables you to manage the libraries for Assessments, Workouts and Exercises. When you set up a Trainer ID, these libraries are initialized with a set of standard assessments, workouts and exercises. These are then used as input when creating routines for your Clients. You can add, modify, delete items in these libraries to suit your needs using the Tool Box. For example, you may have entered an exercise with a Category of "Arms" but then want to change it to "Shoulders" - simply use the Exercise Library edit feature and change the Category. It is also possible to add / delete library items in the Client interaction area. Deleting an item is accomplished by swiping left on an item.
Select the Client tab on the bottom Tool Bar to enter the Client management area. Tap the +Client instruction on the top part of the Clients screen to add a client. The required information is the client first and last name, along with height. It is recommended that you also enter birth date. This information is used to facilitate electronic weigh-ins which ask for that data. A number of additional fields such as Preferences, Goals, Nutrition, Health Notes and PAR-Q can be entered by tapping on the buttons with those titles. Information that is not entered here can be added or changed later using the Edit Client menu item. Tap Save in the top right portion of the screen to save data you have entered for a client.
Once a client has been successfully added, a summary of client information will appear on the left of the screen. This summary will contain the name, current phase and contact information. Additionally an indicator (small book) will appear if weigh-in data has been entered for the client (tapping the small (i) to the right of the book icon will display the weigh-in history for that client).
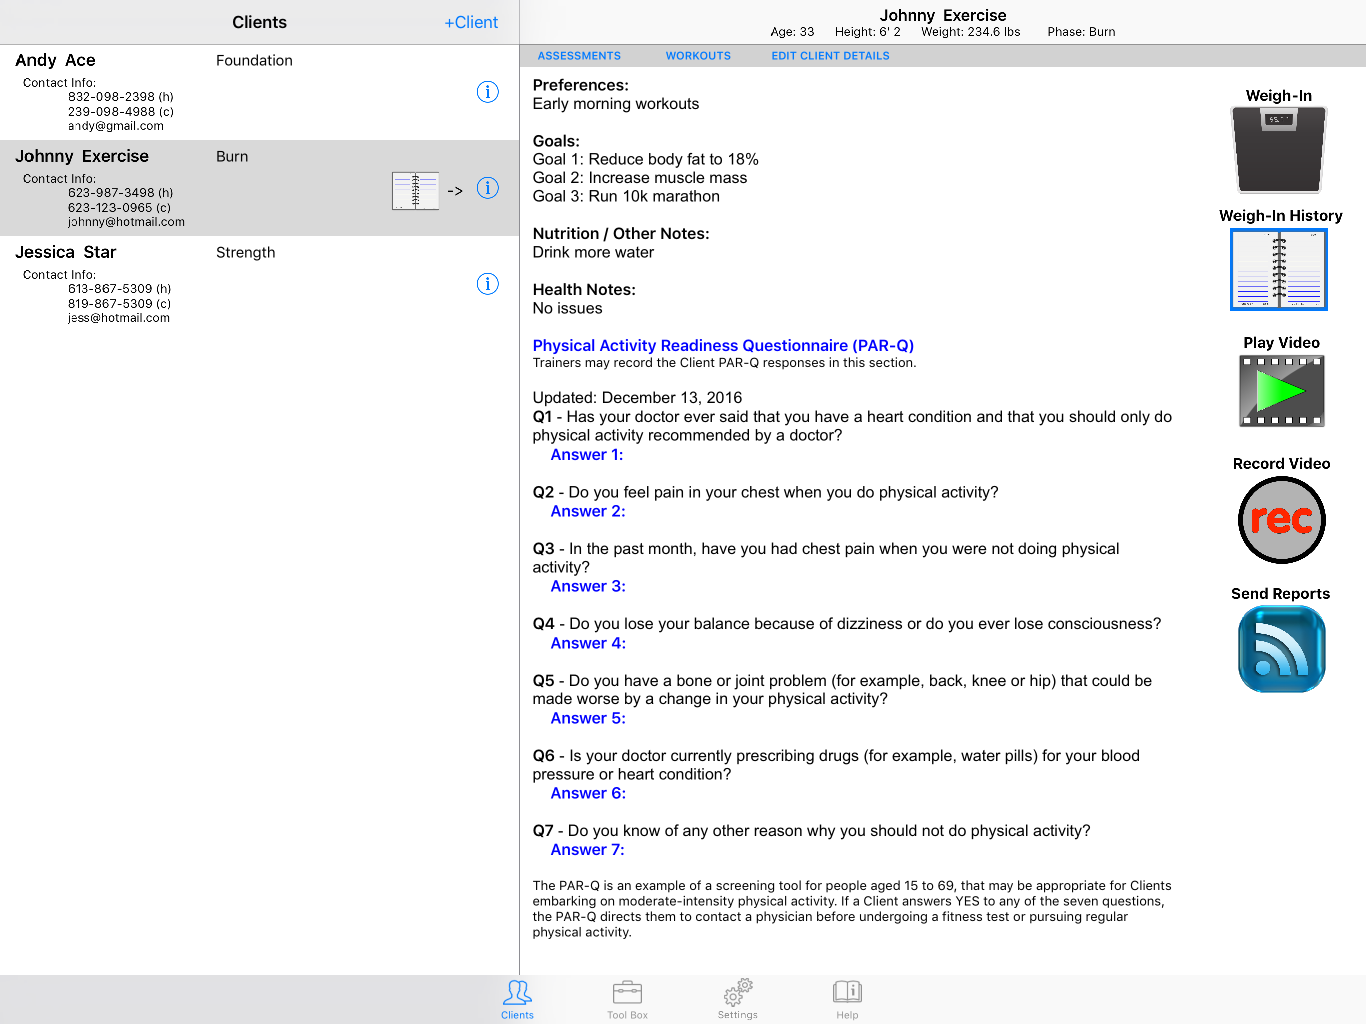
To manage a clients fitness data, tap on the client name in the summary table that appears in the leftmost table. This will reveal a detailed client summary for the client selected, along with a set of menus that enable further processing of client information.
At the top of the detail client area, there is a menu that enables you to navigate to Client Assessments, Client Workouts or to Edit Client Details.
At the far right of the detail client area, is a series of buttons that enable you to add weigh-in data, review weigh-in history, review the video library, record a video for a client, or create and send reports of client fitness (or client homework assignments - exercise or nutrition).
In the centre of the detail screen are the details of everything entered for the clients preferences, goals, nutrition and health notes, along with the PAR-Q if entered. This data is scrollable.
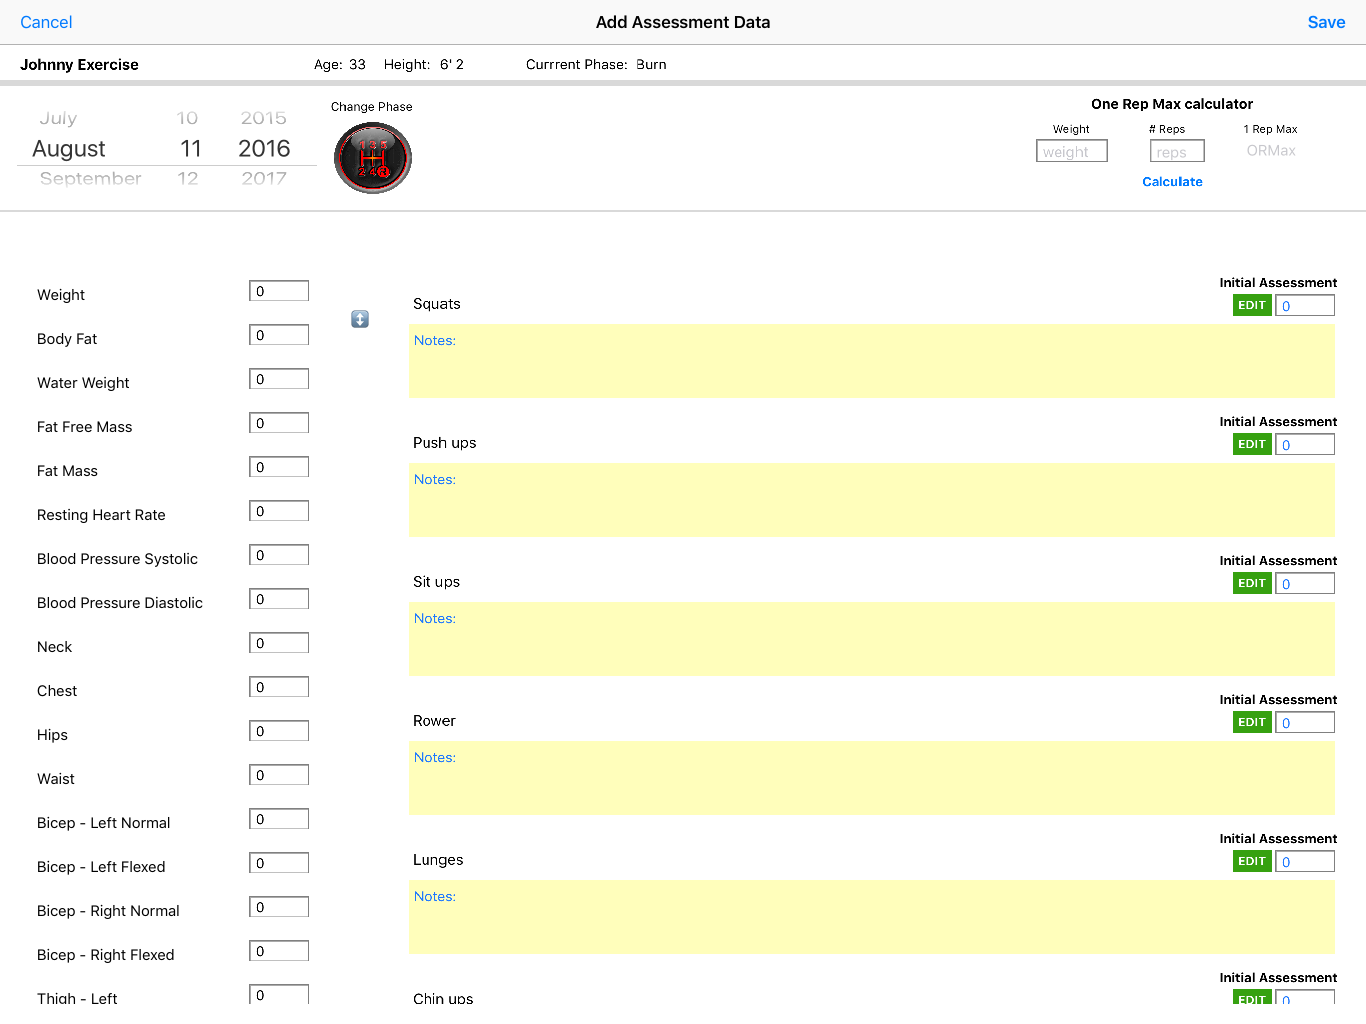
The app is based on the assumption that clients will begin training in the Foundation phase and progress though the other phases (Burn, Build, Strength) and then repeat those phases over and over again (ie Burn, Build and Strength). At the beginning and end of each phase, an assessment is completed by the trainer to assist in determining progress against goals. The Assessment menu item on the client detail screen takes you into this functionality.
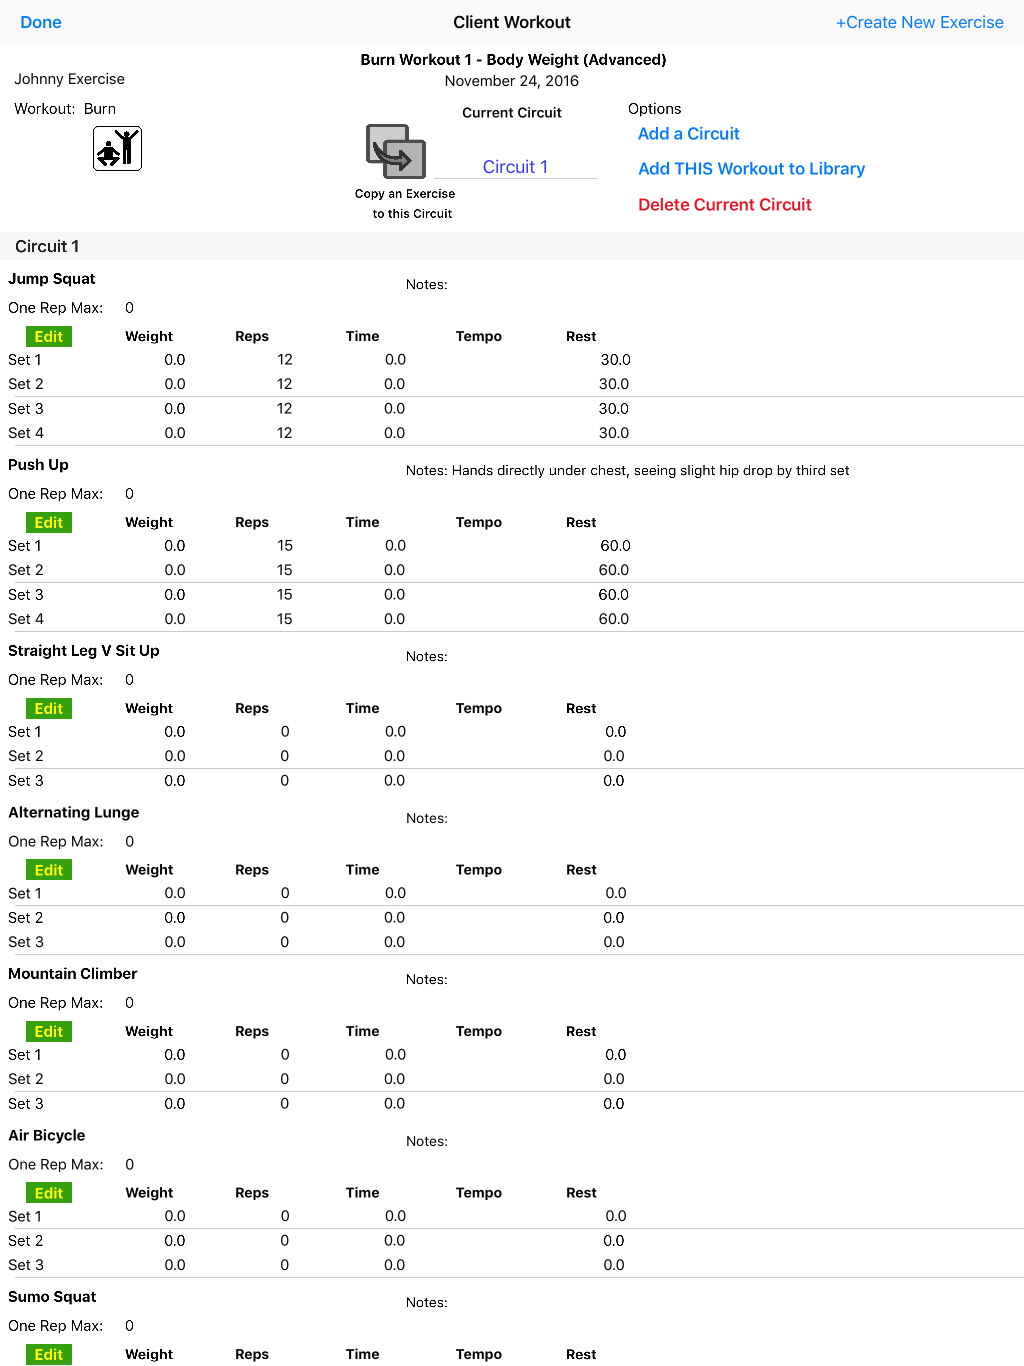
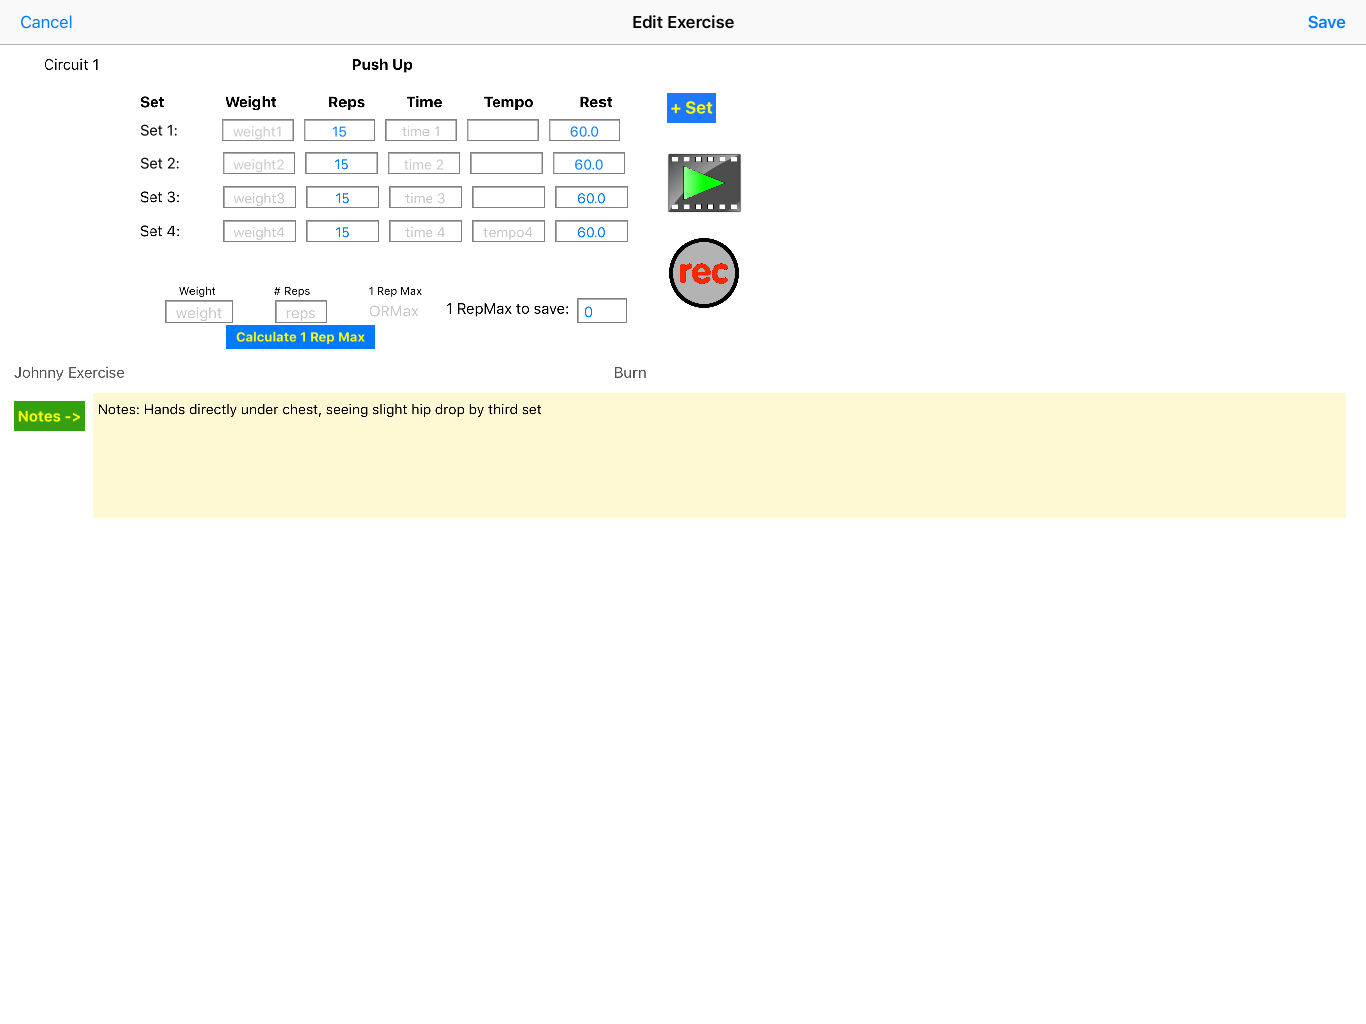
While working a client within a phase, the Workouts menu item in the detail client screen allows you to track their progress. You add workouts using the +Workout selection. This area allows you to copy a workout from the workout library or create a workout of your own choosing. Once a workout is created, it will appear in the workout list for a client. To edit it, simply tap on the workout title for a specific date. This will bring you to a client workout screen that summarizes the exercises and circuits for this workout. You can add additional exercises to the workout either by using the “Copy Exercise” button (which copies an exercise from the library) OR you can create a new exercise of your own using the +Create New Exercise button. To edit an exercise in the client workout, tap the green EDIT button under the exercise name. This will bring you to a screen where you can enter weight, reps, time etc. In this area you can also record a video of the client doing an exercise, and play it back. In the playback area, once you navigate to a specific video, you can play it in normal, fast or slow motion speed as well as annotate the video using the colour pencils provided. This information can be saved for later review.
In the Edit Exercise screen, you can also add additional sets to the exercise (the maximum is 5 sets to an exercise - to add more, simple add the exercise again in the Client workout screen).
Select the +item located on the upper top right part of the screen
Select the table-based item or tap the green EDIT button.
Swipe left on any table-based items to delete it.
Most tables have search capabilities. Some have Scope parameters. Scope parameters appear in blue under the search bar when the search bar is tapped. To search using a scope parameter, you first tap inside the search bar, next press the SPACE BAR and then select the appropriate scope parameter (such as Phase or Exercise Type). Alternatively, you can search without the scope parameter simply by typing inside the search bar without pressing the space bar - this will search the table for items with the text you type.
Main Screen
Client Workout
Edit Exercise Sets
Client Assessment
Fitness Report

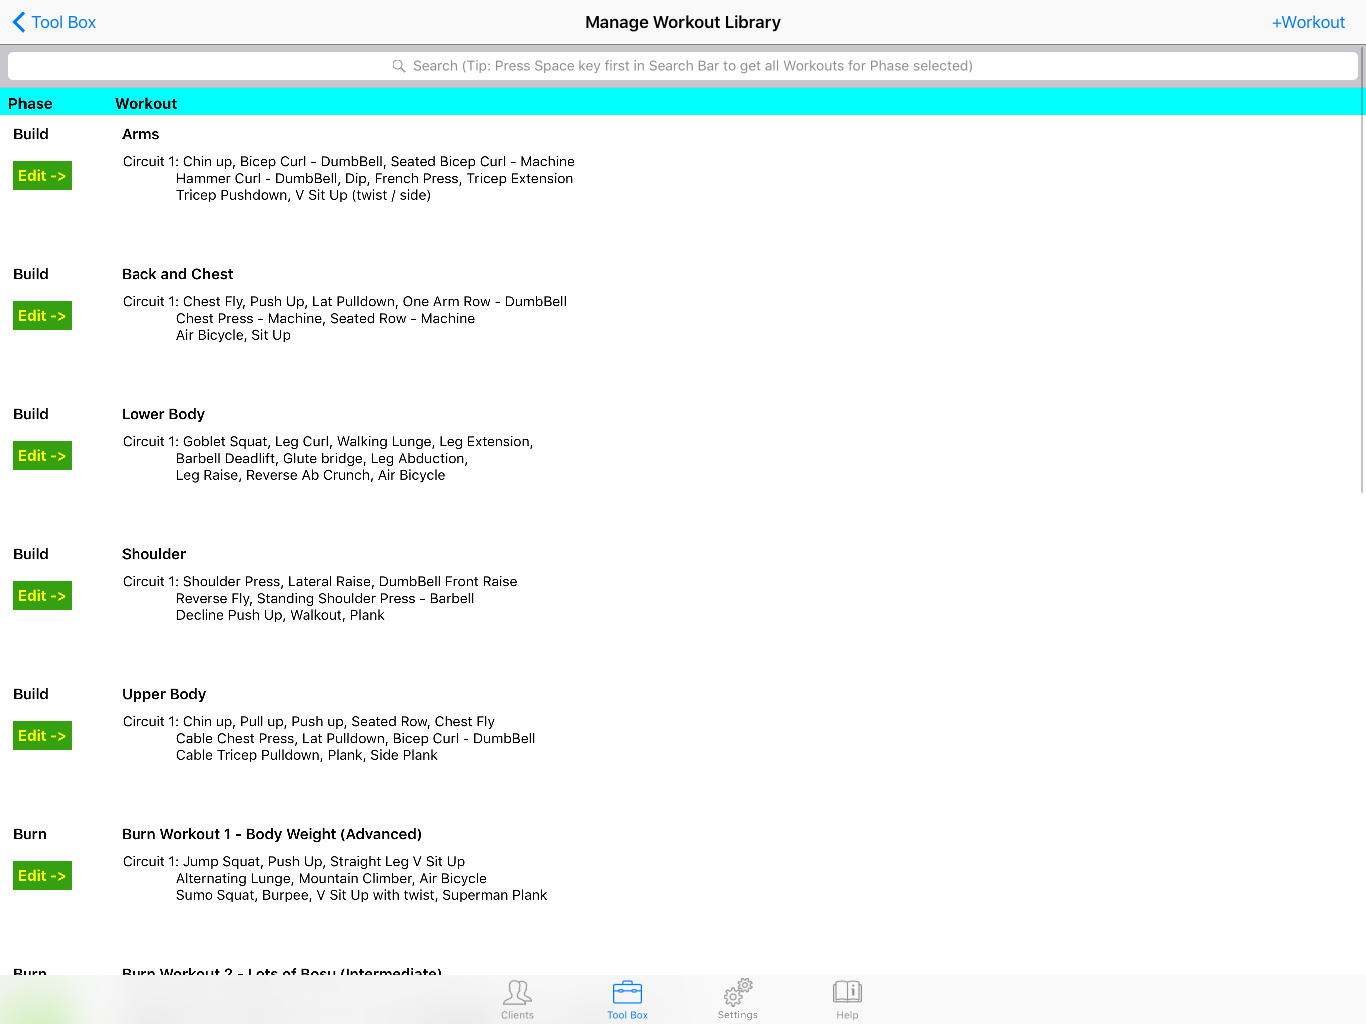
Managing the Workout Library
Toolbox
For support contact rand085@rogers.com